Bloomin onion is one dish you can’t resist. Sometimes, even if it’s full of calories, you need a blooming onion in your life.
It was made for deep-fried goodness. It brings joy into even the most miserable of souls.
You won’t want to let any go to waste, so bring it home, wrap and reheat it for the next day.
This article will guide you on how to reheat a blooming onion to perfection.
What is Bloomin Onion?


The Bloomin Onion is an appetizer that will impress your guests and make a lasting impression on their taste buds.
It comes in various flavors, and the possibilities are endless for what you can do with this onion.
The popular dish originated at Outback Steakhouse in Tampa Bay and has since been copied by other restaurant chains such as Hooters, Carrabba’s Italian Grill, and Red Robin.
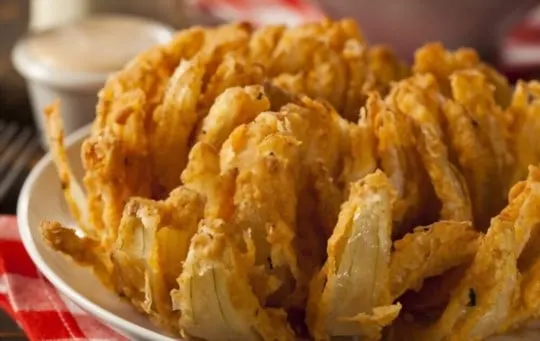
The Bloomin Onion is made up of a deep-fried onion that has been sliced into the shape of an actual flower and then battered in breading, fried to perfection, and served with dipping sauce on the side, either ranch dressing or bacon bits.
A bloomin’ onion can be ordered as part of an entree like any other appetizer (another side dish often accompanies it) but does not come with sides such as a salad or fries, so it doesn’t count toward your order total for meal deals.
You might also find them at some bar menus.
Bloomin Onion vs Onion Rings.

Blooming onions and onion rings are similar but seem to differ in style.
Both have a flavor comparable to an onion ring.
Still, blooming onion is more interesting visually than an onion ring because it’s arranged like a flower rather than just having one long strip of fried food.
You can share a blooming onion with friends.
Let each person bite out of the onion, then pull off pieces and eat them.
You can dip your blooming onion in ranch dressing for an extra taste that will make it feel like you’re at dinner instead of on lunch break.
There are many ways to enjoy a blooming onion, and if you’re a fan of onion rings, then you’ll love this more flavorful variety.
How To Store a Cooked Bloomin Onion?
Do you feel like your Bloomin Onion isn’t as crispy as when you first got it? Have no fear, this is a problem that many people face, and there is an easy solution.
You can store your cooked Bloomin Onion in the fridge for up to three days.
The best way to keep it crispy is by storing it on a paper towel with another underneath to catch any juices that come out of the onion while it cools down.
We recommend placing them in a container or zip-top bag for storage.
The onion will keep in the fridge for 3-4 days.
However, the quality will start to deteriorate after three days, and we suggest eating them soon.
How to Tell if Bloomin Onion is Bad?


Do not be fooled by the Bloomin Onion’s delicious appearance – it can quickly go bad and spoil if mishandled.
Follow these tips to ensure that this tasty treat is available for every dinner party, family gathering, and cookout.
If the blooming onion has been sitting out at room temperature for a few hours, then it may be starting to spoil.
Ensure that the blooming onion is stored in an airtight container and always refrigerated when not being used.
Examine the blooming onion carefully for signs of mold, slime, or discoloration on its surface.
If any are present, discard it immediately; if not, then check out other indicators to assure your blooming onion is fresh and safe.
If it has a strong, fresh onion smell, then it is probably still good.
If there is a very noticeable change in color and texture to the onion itself, as well as an unpleasant or stale odor emanating from the dish, then this blooming onion has spoiled.
How to Reheat Bloomin Onion in Oven?


When you’re ready for more of your blooming onion, choose the method that’s best for how much time you have and how crispy it should come out.
If you’re looking for a crispy blooming onion, then you’ll want to reheat it in the oven.
- Preheat your oven to 425 degrees Fahrenheit (218 Celsius).
- Cut your blooming onion into bite-sized pieces and place them on a baking sheet lined with parchment paper or foil.
- Bake for 15 minutes until they are browned and crispy at the edges.
How to Reheat Bloomin Onion in Toaster Oven?


Are you tired of waiting on a huge Bloomin’ Onion to reheat in the oven? Here’s how you can reheat your Bloomin’ Onion in a toaster oven.
The best part is, it only takes about 10 minutes.
This will be perfect if you just got home from work and want something quick but delicious.
- Heat your toaster oven to 400 degrees.
- Place the Bloomin’ Onion on the rack and set a timer for about 12 minutes.
- Once your oven beeps, turn it off with the toaster. The Bloomin’ Onion will continue cooking from its heat.
So don’t wait around any longer – grab that couch potato of yours and get ready to enjoy this delicious dish once again.
How to Reheat Bloomin Onion in Air Fryer?


Air fryers are all the rage right now.
They offer a crispier and healthier alternative to deep frying with oil and lead to less mess.
Different models vary slightly on the appropriate temperature and time needed to heat thoroughly.
On average, you should preheat the air fryer to 400 degrees Fahrenheit before cooking.
Once it is warmed up, place your Bloomin’ Onion and cook for 5 – 8 minutes, checking in intervals until ready.
How to Reheat Bloomin Onion in Microwave?


If you don’t mind if your blooming onions aren’t as crisp, then microwave them.
Start by cutting off any burnt parts of the skin before microwaving.
Put the blooming onion into a microwave-safe container and cover it with plastic wrap, tucking in any edge that might be sticking out.
Microwave on high for 30 seconds and then check the onion to see if it’s heated through.
You may need a few more minutes, depending on your microwave.
Carefully uncover the onion and let it cool a little before you peel off the skin to reveal those beautiful layers of fried onions that make blooming onions so irresistible.
To heat more than one bloomin’ onion, add another 30 seconds for each additional onion.
What to Do with Leftover Bloomin Onion?


Do you ever have leftovers from your favorite restaurant? One of my favorites is Outback Bloomin Onion.
I love the crispy onion and gooey cheese but often find myself wondering what to do with it.
Here are a few ideas for how to use up the leftover blooming onion.
Add slices of leftover Bloomin Onion to a salad mix for added crunch.
Stir leftovers into scrambled eggs for an extra-special breakfast.
Bake the leftover Bloomin Onion in a casserole dish with cheese and pasta, serving it as a side dish.
Add toasted onion pieces to your next potato soup or chili recipe.
Put some slices on top of burgers before you grill them for added crunchiness.
Serve pieces of leftover blooms over rice, potatoes, polenta, or pasta topped with cheese – just like fried onions.
Top off pizza crusts with a layer of leftover Bloomin Onion before adding pizza sauce, cheese, and other toppings.
Conclusion
Have you ever had a Bloomin Onion from Outback Steakhouse? If so, you know how delicious they are.
But what do you do when the Bloomin Onion isn’t available? Fear not.
There is a way to bring that same flavor back home, and it doesn’t take much time at all.
There are a few ways that will allow your delicious Bloomin onion to be just as good the second time around.
In this blog post, we cover three different reheating methods and offer some tips on what works best for each method.
Which method have you used? Let us know in the comments below.


How to Reheat Blooming Onion? The Best Ways
Ingredients
- Leftover Blooming onion
- Baking Pan or Skillet with Lid
- Stovetop or Oven
- Microwave
Instructions
- Prepare all the required ingredients and equipment in the article.
- Select and follow your desired method to reheat.
- Make sure to set a timer according to the guide.
- Serve and enjoy.